
Modern orthodontics relies on controlled, predictable force application to achieve efficient tooth movement. Among the most effective components for space management are orthodontic coil springs, which are widely used for opening spaces, closing extraction gaps, and delivering continuous forces throughout treatment.
However, even the highest-quality coil spring can underperform if activated improperly. The difference between optimal movement and unwanted side effects often depends on the precision tools used during activation.
In this comprehensive guide, you’ll learn everything about how to activate coil springs with precision tools, including the types of coil springs, essential orthodontic instruments, activation techniques, common mistakes, maintenance practices, and professional recommendations.
Understanding Orthodontic Coil Springs
Orthodontic coil springs are elastic components designed to produce continuous light forces over extended periods. They are commonly manufactured from Nickel Titanium (NiTi) or Stainless Steel (SS) and are positioned on orthodontic archwires.
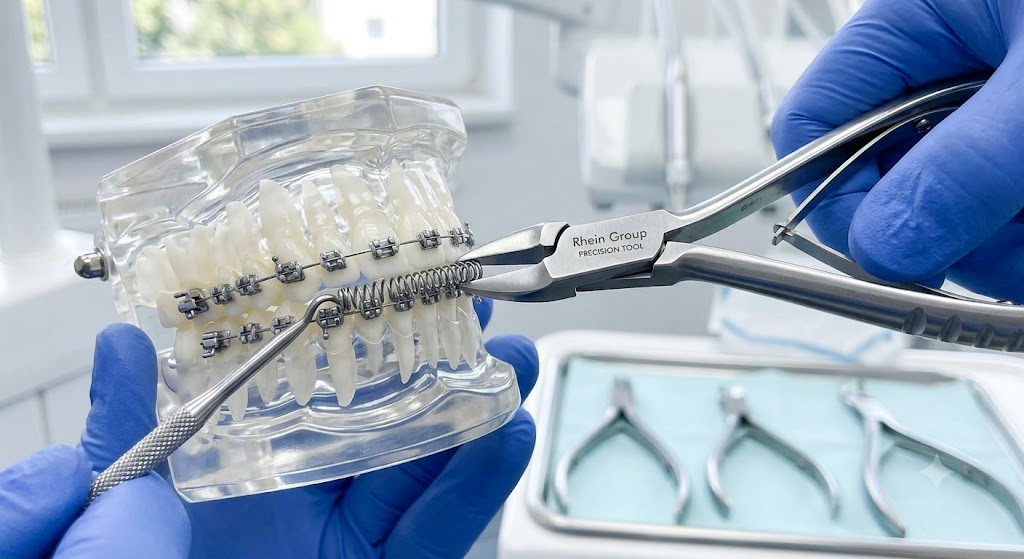
The two primary categories include:
Open Coil Springs
Open coil springs create space between teeth by exerting outward pressure. They are frequently used for:
- Creating room for impacted teeth
- Preparing for implant placement
- Resolving crowding
- Aligning blocked-out teeth
Closed Coil Springs
Closed coil springs generate pulling forces to close spaces.
Common applications include:
- Extraction space closure
- Canine retraction
- Sliding mechanics
- Anchorage-supported tooth movement
Why Precision Matters During Coil Spring Activation
Successful orthodontic treatment depends on delivering consistent biological forces.
Improper activation may lead to:
- Excessive force application
- Root resorption
- Anchorage loss
- Patient discomfort
- Wire distortion
- Delayed treatment progress
- Appliance damage
Using precision orthodontic tools minimizes these risks while improving clinical efficiency.
Essential Coil Spring Orthodontic Tools
Selecting the correct coil spring orthodontic tools significantly improves treatment outcomes.
1. Mathieu Pliers
Mathieu pliers offer excellent grip for:
- Holding coil springs
- Ligature placement
- Elastic module positioning
- Controlled spring activation
Benefits
- Self-locking mechanism
- Ergonomic grip
- Reduced hand fatigue
- Precise handling
2. Bird Beak Pliers
Bird beak pliers assist in:
- Wire bending
- Spring adjustments
- Creating loops
- Minor appliance modifications
Their narrow tips provide exceptional control.
3. Weingart Utility Pliers
These versatile pliers help with:
- Archwire insertion
- Coil spring positioning
- Appliance retrieval
- Wire manipulation
4. Distal End Cutters
Used for:
- Trimming excess wire
- Preventing soft tissue injury
- Finishing archwire adjustments
5. Ligature Director
Ideal for:
- Seating coil springs
- Guiding ligatures
- Positioning wires accurately
6. Mosquito Forceps
Useful when:
- Working in confined spaces
- Holding auxiliaries
- Managing small orthodontic components
7. Bracket Holding Tweezers
Provide excellent visibility during:
- Spring placement
- Auxiliary positioning
- Bracket handling
Choosing the Right Coil Spring Material
Nickel Titanium (NiTi)
Advantages include:
- Superelastic properties
- Shape memory
- Constant force delivery
- Longer activation range
- Less frequent adjustments
Best for:
- Initial alignment
- Space opening
- Gentle continuous forces
Stainless Steel
Advantages:
- Higher rigidity
- Excellent durability
- Cost-effective
- Predictable mechanics
Best for:
- Controlled space closure
- Finishing mechanics
- Specific anchorage systems
Step-by-Step Guide: How to Activate Coil Springs with Precision Tools
Step 1: Evaluate the Treatment Plan
Before activation, assess:
- Space requirements
- Archwire size
- Tooth movement objectives
- Anchorage needs
- Force levels
Accurate diagnosis prevents unnecessary adjustments.
Step 2: Select Appropriate Precision Instruments
Prepare:
- Mathieu pliers
- Weingart pliers
- Bird beak pliers
- Ligature director
- Distal cutter
Using dedicated orthodontic instruments improves precision.
Step 3: Measure Available Space
Measure the distance carefully between brackets or stops.
Avoid estimating by eye.
Accurate measurements ensure proper activation.
Step 4: Position the Coil Spring
Using Weingart or Mathieu pliers:
- Slide the spring onto the archwire.
- Confirm correct orientation.
- Avoid twisting the spring.
- Ensure proper seating.
Step 5: Activate the Spring
For open coil springs:
Compress the spring to the prescribed activation length.
For closed coil springs:
Stretch the spring according to treatment objectives.
Always follow the manufacturer’s recommended activation range.
Step 6: Verify Force Delivery
Inspect for:
- Smooth movement
- Stable wire engagement
- Balanced activation
- Proper spring positioning
Avoid excessive force.
Step 7: Secure the Assembly
Complete the procedure using:
- Crimpable stops
- Ligatures
- Hooks
- Elastomeric modules (if indicated)
Step 8: Reevaluate
Check:
- Patient comfort
- Soft tissue clearance
- Appliance stability
- Wire integrity
Clinical Tips for Accurate Coil Spring Activation
Experienced orthodontists often follow these best practices:
- Use high-quality orthodontic instruments.
- Replace worn pliers.
- Maintain consistent activation lengths.
- Measure before every adjustment.
- Avoid repeated overactivation.
- Use magnification when necessary.
- Keep instruments properly sterilized.
- Document force applications.
Common Mistakes to Avoid
Overcompressing Open Coil Springs
May produce:
- Excessive forces
- Patient pain
- Anchorage loss
Stretching Closed Coil Springs Beyond Limits
Can cause:
- Force degradation
- Permanent deformation
- Reduced effectiveness
Using Damaged Instruments
Old or misaligned pliers reduce precision.
Routine instrument inspection is essential.
Incorrect Archwire Selection
Coil springs perform best on appropriately sized archwires.
Undersized wires reduce force control.
Ignoring Friction
High friction may limit tooth movement despite proper activation.
Always evaluate wire-bracket interaction.
Instrument Maintenance for Long-Term Accuracy
Quality precision orthodontic instruments require regular maintenance.
Recommended practices include:
- Ultrasonic cleaning
- Proper sterilization
- Routine lubrication (where applicable)
- Tip alignment checks
- Joint inspection
- Protective storage
Well-maintained tools provide more accurate activation and longer service life.
Benefits of Precision Coil Spring Orthodontic Tools
Using professional orthodontic instruments offers numerous advantages.
Improved Treatment Efficiency
Accurate force application reduces unnecessary appointments.
Better Patient Comfort
Controlled activation minimizes discomfort.
Predictable Tooth Movement
Consistent forces produce more reliable clinical outcomes.
Reduced Chair Time
Efficient instruments streamline procedures.
Longer Instrument Lifespan
Premium stainless steel instruments withstand repeated sterilization.
Enhanced Clinical Confidence
Orthodontists gain better control over appliance mechanics.
How Manufacturers Ensure Precision
Leading orthodontic instrument manufacturers focus on:
- Medical-grade stainless steel
- Precision machining
- Corrosion resistance
- Ergonomic handles
- Fine tip alignment
- Strict quality control
- International manufacturing standards
- Repeated performance testing
Conclusion
Learning how to activate coil springs with precision tools is essential for achieving safe, predictable, and efficient orthodontic outcomes. Proper technique, accurate measurements, and the use of high-quality coil spring orthodontic tools help clinicians deliver consistent force while minimizing treatment complications.
Whether activating open coil springs for space creation or closed coil springs for space closure, selecting reliable precision orthodontic instruments and following evidence-based protocols improves treatment efficiency, patient comfort, and long-term clinical success. For orthodontic practices, investing in durable, ergonomic, and accurately engineered instruments is key to delivering high-quality care and achieving optimal results.
Frequently Asked Questions:
They are specialized orthodontic instruments used to position, activate, compress, stretch, and adjust orthodontic coil springs accurately during treatment.
Mathieu pliers, Weingart utility pliers, and bird beak pliers are among the most commonly used tools because they provide secure grip and precise control.
Open coil springs create space by pushing teeth apart, while closed coil springs close spaces by pulling teeth together.
Yes. Excessive activation can lead to discomfort, unwanted tooth movement, anchorage loss, and increased risk of root resorption.
Orthodontic instruments should be inspected regularly for tip alignment, joint wear, corrosion, and overall performance to maintain clinical accuracy.