
Sterilization is one of the most important responsibilities in every orthodontic practice. Since orthodontic instruments come into direct contact with saliva, blood, and oral tissues, they must be thoroughly sterilized after every patient to prevent cross-contamination and comply with infection control standards(Orthodontic Instrument Autoclave).
An orthodontic instrument autoclave remains the gold standard for sterilizing reusable orthodontic tools because it effectively destroys bacteria, viruses, fungi, and bacterial spores using saturated steam under pressure(Orthodontic Instrument Autoclave).
Whether you’re sterilizing Weingart pliers, ligature cutters, distal end cutters, band removers, bracket positioning tweezers, or bite sticks, following proper autoclave procedures protects both patients and instruments while extending the lifespan of your valuable equipment.
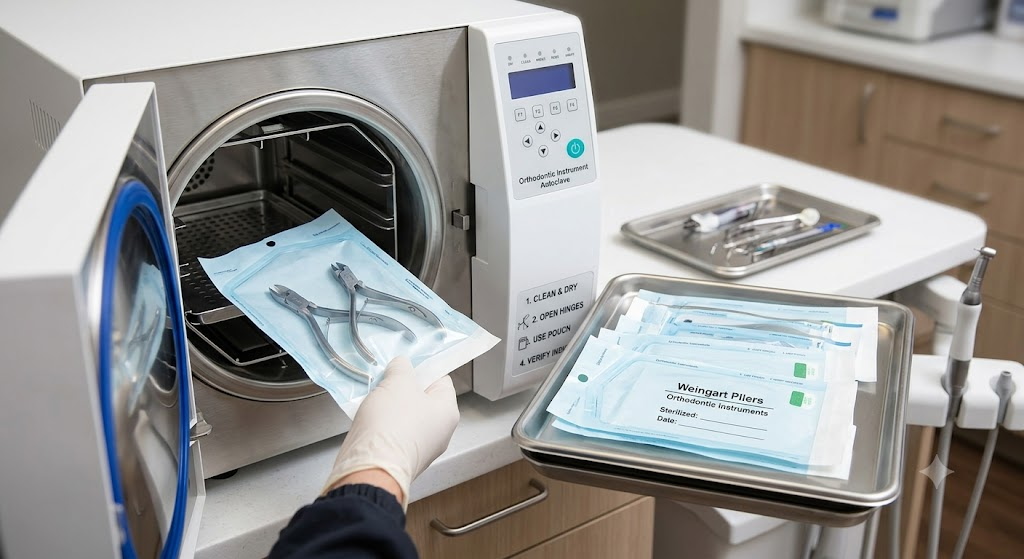
This comprehensive guide explains the best practices for using an orthodontic instrument autoclave, common sterilization mistakes, maintenance tips, and frequently asked questions.
Why Proper Autoclaving Matters in Orthodontics
Orthodontic procedures involve repeated contact with oral fluids and microscopic debris. Even when instruments appear clean, harmful microorganisms may still remain.
Proper autoclave sterilization helps:
- Prevent cross-infection
- Eliminate bacteria and viruses
- Destroy resistant bacterial spores
- Meet infection control regulations
- Improve patient confidence
- Protect dental staff
- Increase instrument longevity
- Reduce costly instrument replacement
Modern orthodontic clinics rely on validated sterilization procedures to maintain the highest standards of patient safety.
What Is an Orthodontic Instrument Autoclave?
An orthodontic instrument autoclave is a medical sterilization device that uses pressurized saturated steam to eliminate microorganisms from reusable orthodontic instruments.
Unlike chemical disinfectants, steam sterilization reaches microscopic crevices that cannot be reliably disinfected manually.
The sterilization process generally includes:
- Cleaning
- Inspection
- Drying
- Packaging
- Steam sterilization
- Drying cycle
- Storage
Skipping any of these steps may compromise sterilization effectiveness.
How an Autoclave Works
Autoclaves sterilize instruments using three critical factors:
Steam
High-temperature saturated steam transfers heat efficiently.
Pressure
Pressure allows steam temperatures to exceed the boiling point of water.
Time
Exposure time ensures complete microbial destruction.
Typical sterilization cycles include:
| Cycle | Temperature | Typical Time |
|---|---|---|
| Gravity displacement | 121°C | 30 minutes |
| Pre-vacuum | 132–134°C | 4–7 minutes |
| Flash sterilization* | Short cycle | Emergency use only |
*Routine flash sterilization is generally discouraged except in specific situations following infection control guidelines.
Instruments That Can Be Autoclaved
Most stainless steel orthodontic instruments are steam sterilizable, including:
- Weingart pliers
- Bird beak pliers
- Ligature cutters
- Distal end cutters
- Bracket removing pliers
- Band removing pliers
- Mathieu needle holders
- Bracket positioning tweezers
- Explorers
- Mouth mirrors
- Bite sticks
- Utility pliers
- Separating pliers
- Ligature directors
- Wire bending pliers
Always verify manufacturer instructions before sterilizing specialty instruments.
Step-by-Step Orthodontic Instrument Autoclave Process
1. Clean Instruments Immediately After Use
Sterilization cannot penetrate heavy organic debris.
Pre-clean instruments by:
- Rinsing immediately after treatment
- Preventing blood from drying
- Using enzymatic cleaning solutions
- Ultrasonic cleaning
- Mechanical washer-disinfectors
Cleaning should always occur before sterilization.
2. Inspect Every Instrument
Before packaging, inspect for:
- Rust
- Cracks
- Loose joints
- Misalignment
- Broken cutting edges
- Corrosion
- Residual debris
Damaged instruments should be repaired or replaced.
3. Dry Thoroughly
Residual moisture may:
- Cause corrosion
- Damage sterilization pouches
- Reduce sterilization efficiency
Use lint-free cloths or medical air drying systems.
4. Lubricate Hinged Instruments
Use only:
Steam-compatible instrument lubricants
Never use household oils or petroleum-based lubricants because they interfere with sterilization.
5. Package Properly
Packaging maintains sterility after the cycle.
Use:
- Sterilization pouches
- Instrument cassettes
- Sterilization wraps
Each package should include:
- Chemical indicator
- Sterilization date
- Operator initials
- Load number (if applicable)
6. Load the Autoclave Correctly
Proper loading allows unrestricted steam circulation.
Best practices:
- Avoid overcrowding
- Place pouches paper-side up when recommended
- Stand pouches vertically if required
- Separate heavy instruments
- Keep hinged instruments open
- Follow manufacturer loading instructions
Incorrect loading is one of the leading causes of sterilization failure.
7. Select the Correct Sterilization Cycle
Choose the cycle based on:
- Instrument material
- Packaging type
- Manufacturer recommendations
- Autoclave specifications
Never shorten sterilization cycles to save time.
8. Allow Complete Drying
Do not remove packages while wet.
Wet packs may:
- Become contaminated
- Tear easily
- Lose sterility
Always allow the drying cycle to finish completely.
9. Store Properly
Store sterilized instruments:
- In clean cabinets
- Away from moisture
- Away from dust
- Away from direct sunlight
- In sealed packages until use
Proper storage helps preserve sterility.
Common Autoclave Mistakes to Avoid
Many sterilization failures result from preventable errors.
Avoid:
- Overloading the chamber
- Skipping cleaning before sterilization
- Using damaged pouches
- Mixing incompatible instruments
- Using incorrect cycle settings
- Interrupting drying cycles
- Ignoring maintenance schedules
- Using tap water when distilled water is recommended
- Failing biological monitoring
- Reusing single-use products
Autoclave Maintenance Best Practices
Routine maintenance improves performance and extends equipment life.
Daily:
- Clean chamber
- Empty waste water
- Check door seal
- Inspect trays
Weekly:
- Clean filters
- Inspect drains
- Remove mineral deposits
Monthly:
- Inspect gaskets
- Test safety valves
- Review maintenance logs
Regular servicing reduces unexpected downtime.
Sterilization Monitoring
Sterilization should be routinely monitored using three methods.
Mechanical Monitoring
Observe:
- Temperature
- Pressure
- Cycle time
Chemical Indicators
Chemical indicators verify that sterilization conditions were reached.
Examples include:
- External indicator tape
- Internal indicator strips
- Integrators
Biological Indicators
Biological spore testing is considered the most reliable method for verifying sterilization effectiveness.
Regular biological testing provides documented evidence that the autoclave is functioning correctly.
Water Quality Matters
Poor water quality contributes to:
- Mineral deposits
- Corrosion
- Chamber damage
- Instrument staining
Most manufacturers recommend distilled or demineralized water.
How Often Should Orthodontic Instruments Be Autoclaved?
Reusable orthodontic instruments should be:
- Cleaned after every patient
- Sterilized after every use
- Stored in sterile packaging until needed
There should never be reuse without complete sterilization.
Protecting Orthodontic Instruments During Autoclaving
To maximize instrument life:
- Use high-quality stainless steel instruments
- Avoid mixing carbon steel with stainless steel
- Lubricate hinges regularly
- Remove instruments promptly after drying
- Store in dry environments
- Avoid harsh chemicals
- Inspect routinely for wear
Proper care significantly extends instrument lifespan.
Infection Control Compliance
An effective sterilization program supports:
- Patient safety
- Staff protection
- Regulatory compliance
- Clinical quality assurance
- Professional reputation
Document every sterilization cycle, monitor biological testing results, and maintain maintenance records for quality assurance.
Final Thoughts
An orthodontic instrument autoclave is essential for maintaining safe, compliant, and efficient orthodontic practice. However, achieving reliable sterilization involves much more than simply pressing the start button. Thorough cleaning, careful inspection, correct packaging, appropriate cycle selection, proper loading, complete drying, routine maintenance, and regular sterilization monitoring all contribute to successful infection control.
By following these autoclave best practices, orthodontists can reduce the risk of cross-contamination, protect patients and staff, preserve valuable instruments, and ensure consistent clinical excellence.
Frequently Asked Questions
Can orthodontic pliers be autoclaved?
Yes. Most stainless steel orthodontic pliers are designed for steam sterilization. Always follow the manufacturer’s instructions for use (IFU).
Can I sterilize instruments without cleaning them first?
No. Organic debris can shield microorganisms from steam, making sterilization ineffective. Thorough cleaning must always precede sterilization.
Why are my orthodontic instruments rusting after autoclaving?
Rust may result from:
- Inadequate drying
- Poor water quality
- Residual chemicals
- Improper cleaning
- Mixed-metal contact
- Lack of instrument lubrication
How often should biological spore tests be performed?
Follow your local regulations and professional guidelines. Many practices perform biological monitoring at least weekly and whenever an autoclave is newly installed, repaired, or relocated.
Should hinged orthodontic instruments remain closed during sterilization?
No. Hinged instruments should generally remain open to allow steam to contact all surfaces effectively.